
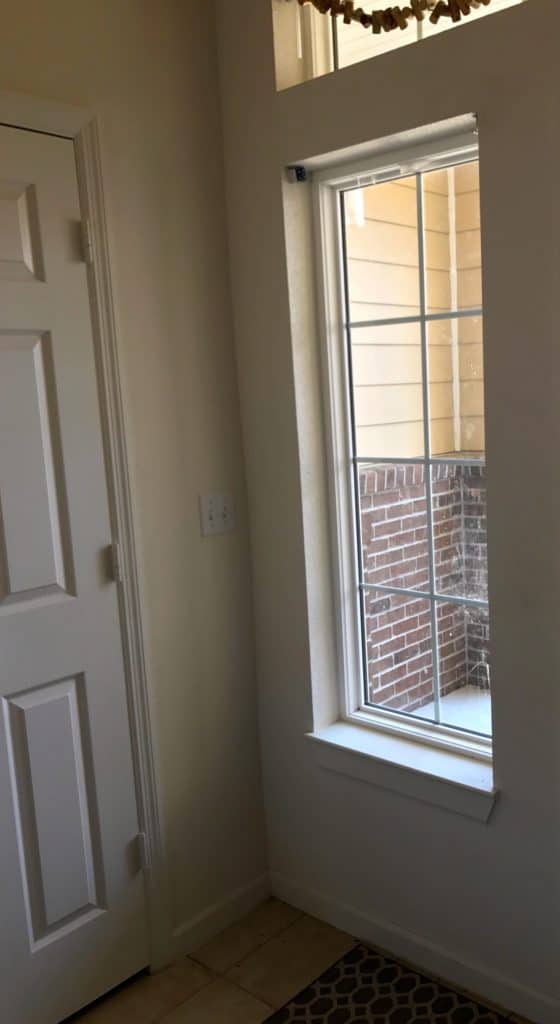
I have a little whose mission seems to be to wreck every cheap mini-blind in our home. He has completed roughly 60% of his mission. (To be fair, he’s not trying to break stuff, just wants to look outside and I forget to raise the blinds sometimes.) I don’t care for cheap mini-blinds; I love Roman shades but they take a while to make. We need to see outside (various contact paper solutions not an option) but it can’t look ridiculous (curtain on a narrow window, talkin’ to you).
Enter Faux Tension Rod Roman Shades
Doing some research, I came across a zillion pins for “Faux Roman Shade” and “Tension Rod Shade.” I can’t believe I didn’t think of this, or that it took me so long to find it.
I’d love to show you one particular post to give credit but the truth is there were many I read before I settled on my method, so I encourage you to search faux Roman shade for yourself as there are many ways to accomplish the task. If you can find a table runner or similar that happens to fit your
Dropcloth Linen Substitute
I really wanted a soft fabric that truly looks like old linen. I love linen because it can be adapted to any decor, from casual to the most elegant, by changing hardware and tiebacks and draping a certain way. I love faux linen because it costs a fraction of what real linen does. I knew people use dropcloth to substitute, but I was more than skeptical I’d be able to find what I was looking for. I decided to compare dropcloths from Lowes and WalMart, knowing this would allow almost anyone to find the supplies for this project.
For this project and for my preference, the WalMart version wins hand’s down. Lowes dropcloths are fine with regard to quality (and in fact, for dropcloths for painting, they’d be a better choice). Still, the hand of the WalMart
A note about dropcloths, no matter where you get them – occasionally, you’ll get one with a seam sewn down the middle. If that interferes with your project, simply exchange it for another. I haven’t gotten two in a row yet.
You can also get inexpensive dropcloths at Harbor Freight, Home Depot, and probably any hardware store. I haven’t tried those so if you have, I’d love to hear your thoughts.
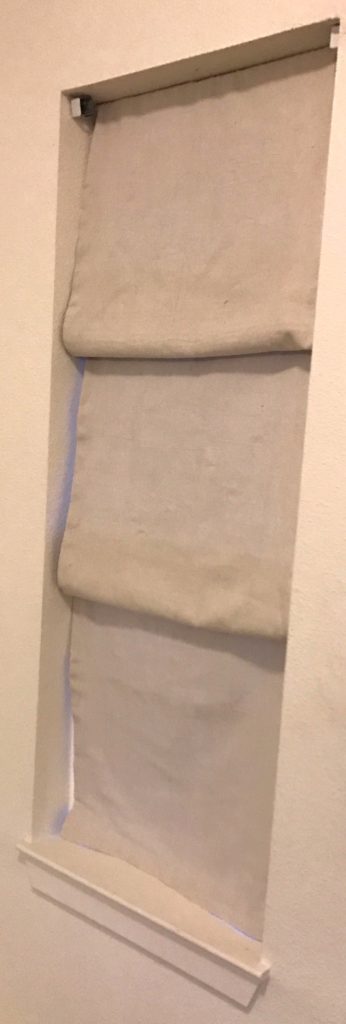
In addition to the drop cloths, I bought 3 tension rods that fit inside my window. You can buy as many or few as you like, see the photos below. The spacing is really up to you. I left the bottom hanging so my little can look outside, you can add an additional rod there if you want everything straight and stable.
It’s important to note you can’t make a spring rod faux Roman shade for a window wider than a tension rod can securely fit in, the shade will fall.
How To
Measure the length and width of the inside of your window.
Measure and cut two pieces of dropcloth that each measure two times the length plus 1 inch total for seams and one time the width plus 1 inch total for seams. Basically, you’re shooting for two long rectangles that are two times the length of your window, the same width as your window, with 1/2 inch all around for seams.
Note – if you are short on fabric, you can get away with 1.5 times the length, you just won’t have as many folds or as much to fold over.
Pin the right sides together (just guess, they’ll look really similar). Sew the long sides using a 1/2 inch seam allowance but stop an inch before you get to the corners on one end (both, if you plan to use a bottom rod) to leave room for your tension rods to go through (see pics).
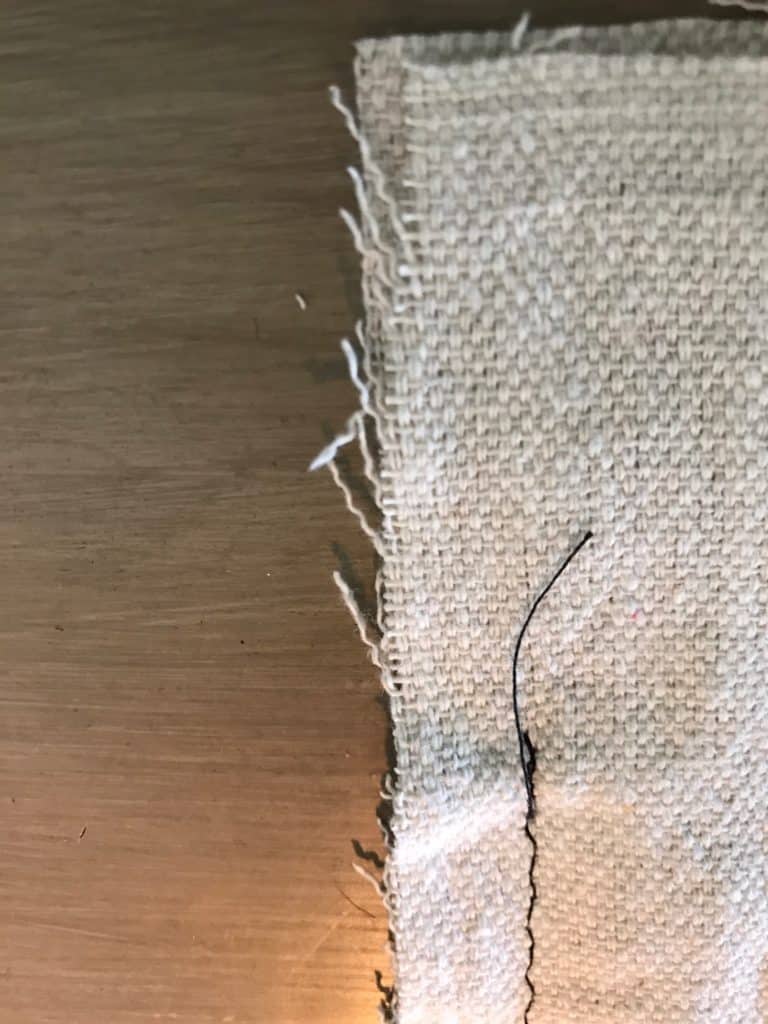
I used dark thread just so you could see it, match your thread to your fabric. If you’re using one rod at the top and none at the bottom, sew the bottom shut using a 1/2 inch allowance. Sew the top shut, stopping 3 inches short of one end (and still leaving the holes for the rods).
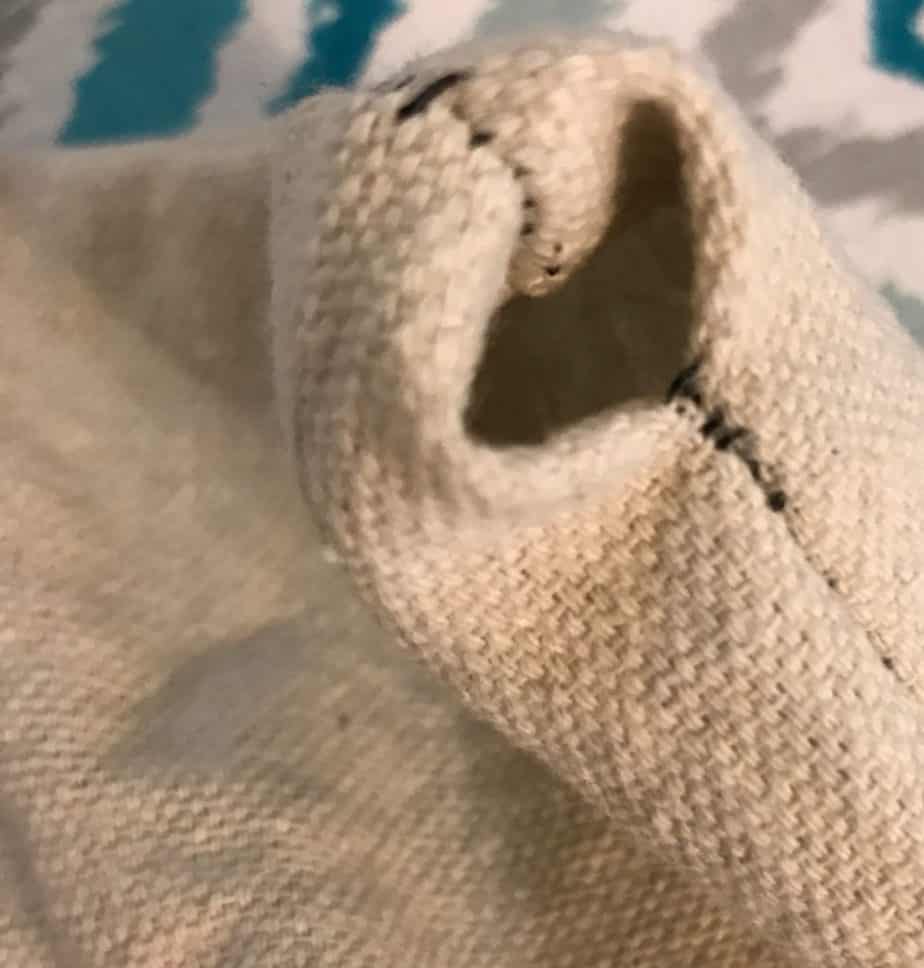
This leaves you an open corner to pull the fabric through when you complete the next step – it’s like making a giant pillow cover, but leaving room for the top (and bottom if you’re using it) rod. Turn right side out, press (turning under the top as you do to make closing it easier).

Ladder stitch the top closed, leaving the 1-inch holes in the top corners for the rod (see below). If you’re using a bottom rod, do the same there.
Tuck in the corner hole edges. I just tucked them in and pressed them flat, I didn’t sew them. (I am certain someone who sews beautifully will come along and tell us a much prettier, finished way to do this but I knew it wouldn’t be showing so this is what I went with.)
Place the top rod through the top of the shade, hang at the top of your window. (Again, ignore the brackets, I didn’t have the right screwdriver to remove them when I did this project.) Place the additional rods (I divided my window into thirds, you do you) in front of the fabric.
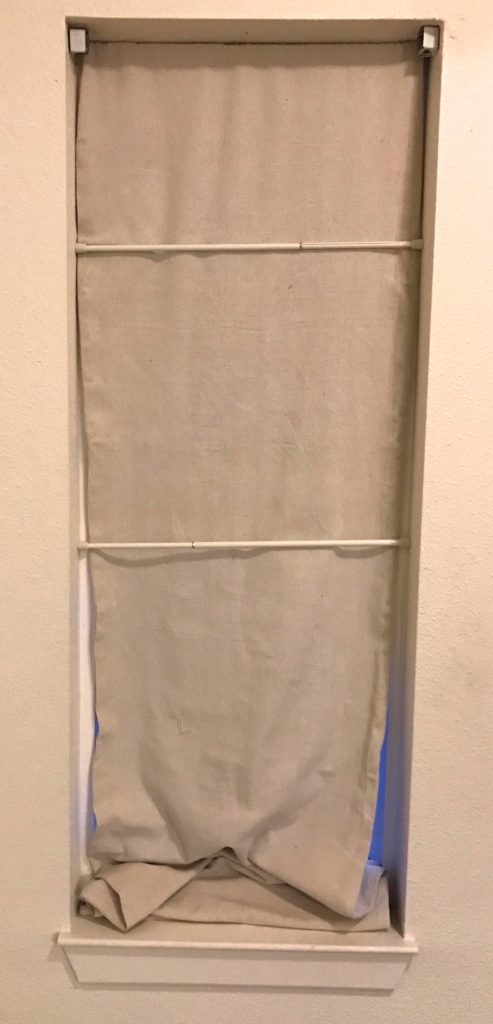
Pull it through and drape the fabric over the rods in a manner that suits you.
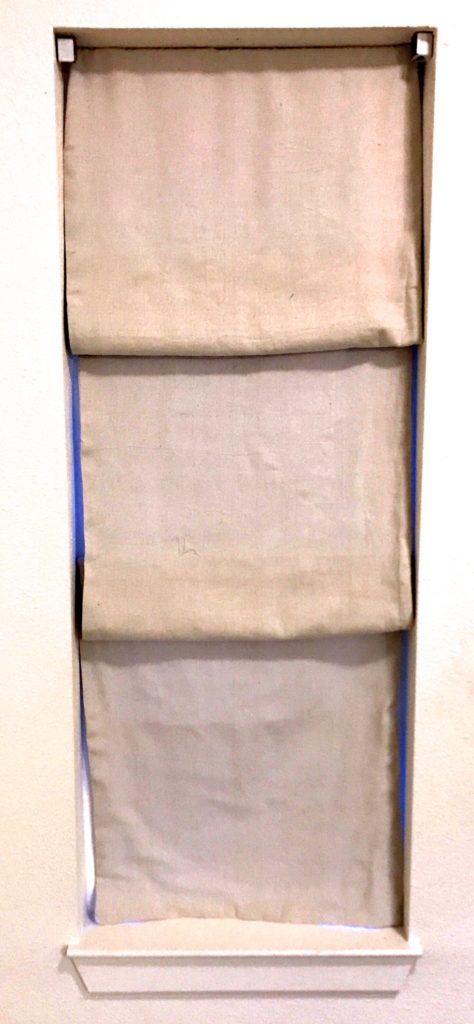
This is my favorite Pinterest win so far, not just because it’s simple and pretty (it is) but because it’s utterly kid-proof. My apologies for some of the photos, the lighting in my foyer is not the best.
A few rock stars used different fabrics for a faux Roman shade and it was reversible. I think toile and ticking stripe would be fantastic, or toile with gingham or buffalo check. Also, people sometimes sew it in a large loop, rather than a pillowcase style, which works great but I didn’t think would function quite as well with this thick fabric. I’m gearing up to do another in a kid room. I may try it with a layer of blackout liner sandwiched in.
If you have suggestions about how to improve the how-tos, please do let me know. I’m just starting this adventure and want to be as helpful as possible! If you make a shade, please share it in the comments and/or on social media tagged #foodnfabric, I would love to see your results.
Happy sewing!